Incoming Goods
The Incoming Goods form can be opened by either selecting the “Incoming Goods” option on the left menu or by selecting the “Stock Management” menu and then selecting the “Incoming Goods” option.
To populate the incoming goods with a purchase order the purchase order number can be entered into the purchase order text box or the select button “...” can be pressed. This will open the “Search for a Purchase Order” form in which a purchase order can be found and then chosen. When a purchase order is linked to the incoming goods the data grid will be populated with the relevant products. When a purchase order is not linked a supplier will need to be chosen and products added manually. The invoice# from the supplier can be entered into the “Invoice#” text box.
When products are added to the data grid the cost will copy from the Purchase Order, or it will display based on your cost settings. If the price on the suppliers invoice is different to the last purchase price, override this price. Enter the quantity received in the “Receiving” field.

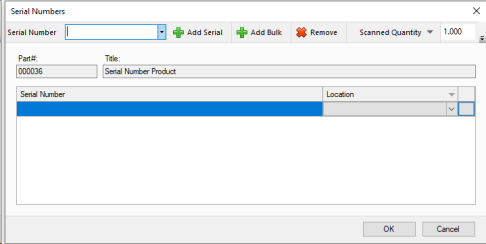
If a product is added that has serial numbers, the “Serial Numbers” form will open.
Add the required serial numbers by entering them into the serial number text box and by pressing the “Add Serial” button.
The serial number will be added to the data grid. Change the location of the stock from the default if required. If there are a number of serial numbers to be added and they are in sequential order, press the “Add Bulk” button. This will open the “Serial Number Bulk” form.
Enter in the first serial number, the last serial number and then press the “OK” button. The bulk serial numbers will be added to the data grid. When all serial numbers have been added, press the “OK” button.
Serial numbers may need to be edited. This may need to be done when incorrect serial numbers were added during the Incoming Goods process.
When adding a serial number product to a sale or sales order the “Serial Numbers” form appears. Select the relevant serial number and then press the “Edit” button. The form “Edit Serial Number” opens. Enter the new serial number in the text box and press “OK”.
Serial numbers can also be changed via the “Serial Number Search” form. Search for the relevant serial number, select the relevant serial number in the data grid and then press the “Edit Serial Number” button.
To validate the number of stock entered into the system and the total cost you can enter details from the suppliers invoice into the text box provided in the reconciliation form accessible from the tool bar.
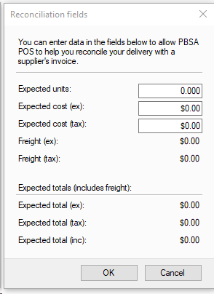
On commit if the units or cost of goods does not match the values entered a message box will display and the commit is cancelled.
Comments can be added in the “Comments” text box which is kept for reference only.
If a purchase order has been linked with the incoming good then once saved the “View Purchase Order” button on the top tool bar can be pressed. The relevant purchase order will open. To return to the incoming goods form, press the green “Back” button.
Landing costs can be added to items already added in the Incoming Goods on a prorated basis. Press the Add landing Costs and enter a value. On pressing the “OK” button the amount entered will be added to all products in the incoming goods.
If an invoice is received in a foreign currency then the items can be entered in incoming goods in that currency. To activate this feature enter in an exchange rate different from “1” in the “Exchange Rate ($) field. This will add a column to the incoming good called “Foreign Cost”. Choose the tax method carefully inc or ex GST when entering in these values.
An incoming good can be saved rather than committed. To save an incoming good simply press the save button on the top tool bar. To find a previously saved incoming good press the search button on the top tool bar.
A search form will open, select the "Only Saved Deliveries" option from the Status drop down and press search. Select the relevant saved incoming good. To commit a saved incoming good simply select the "Commit" button
Labels can be printed from within Incoming goods via the drop down on the print button on the tool bar.
Down the bottom of the incoming goods form there is an option to “Omit Export”. If this option is selected even though in Settings, Accounting Export and the option “Export Incoming Goods” is selected, the particular incoming goods will not be exported. An example where this can be used is when you are going live and are bringing stock in for the first time.
If you have orders or sales pending stock that you bring in via an incoming good you will be prompted as shown below to allocate stock to these sales orders.
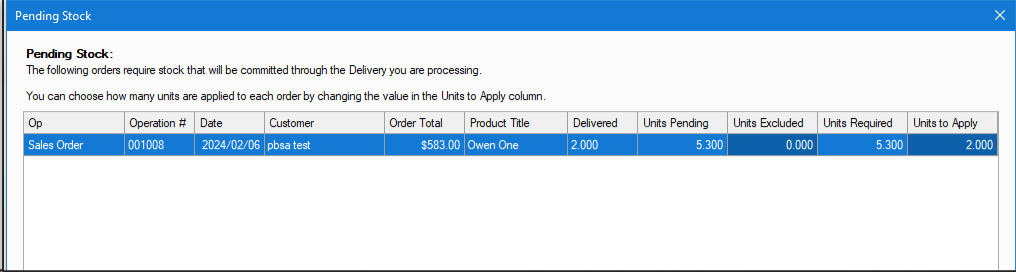
You can set the Units to be excluded column to the amount you want to not be allocated, which will ensure the stock is instead made available for other sales.
You can add notes against each line item, for recording any information such as temp measurements or arrival times. This can be done by double pressing on the blank square to the left of the part# column. Once double pressed you will see the below screen to enter your notes.
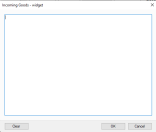
Once this has been added the line item will display a note symbol in that square as shown below.

It is possible to change the sell price of an item added to the incoming goods via selecting the "Reprice products" option on the "Pricing:" drop down menu.
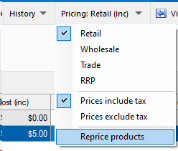
The price that will be adjusted is the one in the price list selected. In the image above the Retail price would be adjusted. When this option is chosen the price column can be edited. The prices will be updated on commit of the incoming goods.
In the touch module you are able to create an incoming good, this will save as you add products for you to then finalise in back office.
To start an incoming goods record select options from the top of your touch screen, then select "Enter Incoming Goods Mode".
You should now see the below screen.
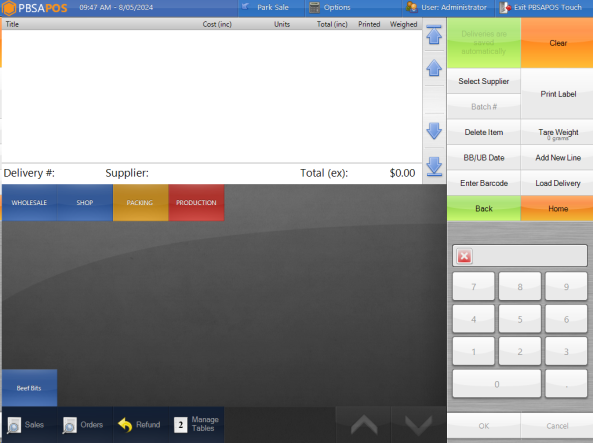
First we will want to use "Select Supplier" to add the supplier for this incoming good.
Once this is done you can add products, and this will auto label as you are entering weights.
When you are done adding you can simply use Exit PBSA POS Touch to return to back office, or select Options and "Exit Incoming Goods Mode" to return to the sales layout of touch.
In incoming goods you are able to record the temp or Piece count of a product in the touch module.
To select which option you want to use first to into Settings > Global Settings > Touch Screen. In here we can use the highlighted drop down to select which option we want to use.
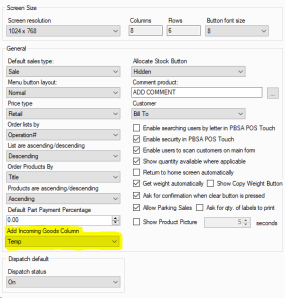
When either option is selected it will show up as an additional column when creating an incoming good in the touch module.
Pieces can be printed on labels, while temp will copy onto your incoming goods notes for that product line allowing you to come back and check that information again later as needed.
This functionality does require the batches module, if you are unsure if you have this please contact support who can assist you further.