Customers
Customer cards are made up of a few tabs, you can find information about each in the below drop down sections. Some fields may not be covered, this will be because they relate to specific features or modules and are covered in that respective part of the manual.
Start with the getting started section to introduce you to the customer management section of PBSA POS, then continue down to learn more about each part of the customer cards.
The Customers module is opened by either selecting “Cards” from the top menu and then selecting “Customers” or by selecting the left menu and selecting “Customers”. The first form opened is the customer management section. This form lists all customers, Account #, Name, City, Phone, Fax, Mobile and Email.
To filter the list of customers choose the option to search by via in the drop down and then enter text into the predictive text box next to the drop drown. To clear the Filter, press the “Clear Search” button. If searching by Address you can change between "Bill To" and "Ship To" addresses and this will change the data being searched. Changing the address type also changes the data in the data grid.

As shown above you are also able to filter via Attributes, Price Types, and if a customer has a suspended account currently.
The first column in the data grid opens the customer properties form, see below. The second column in the data grid displays a graphical icon. If displayed this indicates the customer has a price contract.
To delete a customer select the relevant row and then press the red X (delete) button. When the customer is deleted they are made inactive and are still in the database. To view inactive customers select “View inactive records” from the drop down menu.
If you want to make an inactive record active select the relevant row and then press the green restore button.
You can change the view in order to see active, inactive, or all records.
A report for "Sale Account Activity" can be printed for selected customers by selecting the customer and clicking the print button. This report lists the customer activity for sales and sale payments. This includes deposits made for sale orders that are converted to a sale payment.
You are also able to print or email a customer price list by selecting the email icon (this can be hidden in the drop down on the far right depending on your window size as shown below).

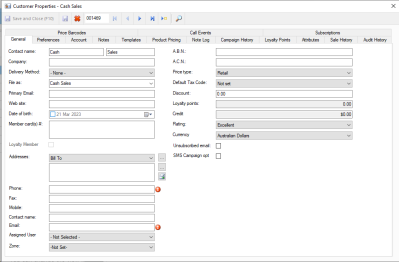
This section covers the generic information about the customer, such as contact details and company information.
For the addresses section a total of seven addresses can be added to the customer properties. There are “Ship To”, “Bill To” and five custom addresses. To rename a custom address press the “...”button. This will open the “Custom Address Type” form. Select a custom address from the list provided and press the “Ok” button.
To enter details, select the relevant address from the drop down menu and then either enter the address directly into the member field or open the “Address Detail” form by pressing the “...” button.
The Phone, Fax, Mobile, Contact Name and Email are linked to the selected address type.
You are also able to set the default price type for this customer, along with their tax code, and the discount amount. For the discount please note this is a percentage not an amount.
Within preferences you are able to set the customers preference for statement and invoice delivery, automatic emailing for invoices, price types they want to see in their documents, along with any custom forms they use.
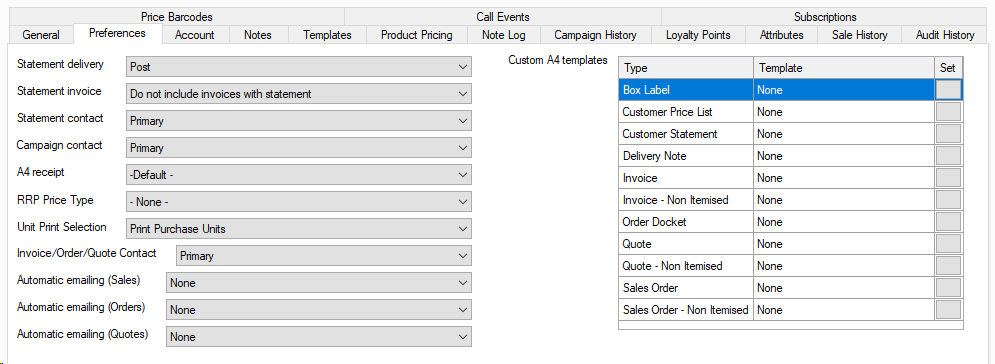
A4 receipt - This decides what document to use for A4 invoices for this customer.
RRP Price Type - The price type used in A4 documents to reference discount amount being given, or their recommended mark up.
Unit Print Selection - This decides which unit to print for documents between purchase and sales units.
Automatic Emailing - Enabling this to prompt will trigger a pop up anytime you commit a sale/order/quote to email this to the customer, if its set to automatic then it will send this without any user input when you press commit.
This section allows you to define what account terms a customer may use.
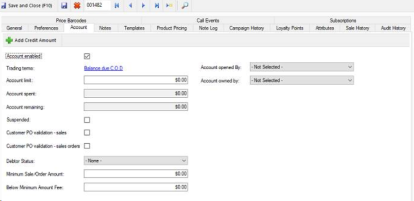
Most of these sections are self explaining but a few are worth giving some extra attention to.
Customer PO validation: Ticking either of these will prompt the user at the time of completing the sale or order if a customer PO has not been entered, they are able to continue past this if they choose to.
Minimum Sales Order Amount: This is a threshold the customer must order at, and if their total before the fee is less then this then the below minimum fee will be applied.
Below Minimum amount fee: The fee only applies when the customer, pre fee addition, is below the minimum order total. This fee can be reduced if the customer has a discount on their general tab.
Below we go over the trading term options you will see when you select trading terms, as shown in the next image.
In a Given # of Days: The balance due days here are after required date on an order or sale.
C.O.D: Cash on delivery, this will require payment to be made on delivery of goods.
On a day of the Month: This makes all invoices issued due on a specific day of the month for payment, regardless of which day they were placed as long as it was after the previous months due date.
# of Days after EOM: This will make any invoices issued in a given month due after the set number of days pass after the last day of that month.
Day of the Month after EOM: This works the same as On a day of the month, but only gets invoices issued in the month previous.
C.B.S: Cash before shipment means payment must be made before goods are shipped, rather then on delivery.
P.I.A: Payment in advance means payment must be made before the order is processed.
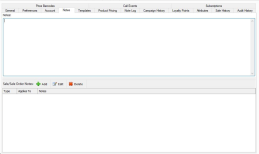
Notes is made up of two sections, the top half is for any general notes you want to internally have for this customer and will not be printed or provided to the customer directly.
The second portion is to add notes to sales orders, sales, or both. This could be delivery instructions, eg. "Use back door if arriving after 8:30am", or any other notes that you want consistently on their orders and/or sales.
Templates allow you to delete any sales templates you may have for the customer, or add a Frequency.
This frequency, as shown below, will have POS create this Order or Sale for you on that frequency until it is removed. This is used mostly for reoccuring orders with little to no variance to save time having to create the order each time.
![]()
Product pricing is the customer side of customer specific pricing on customer cards.
In here you can manage the start date, end date, price (Amount), and any pricing rules or rounding rules you need to apply.
You can also create new prices in here from the add product button.

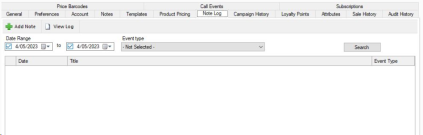
Note Log is an area for logging events, such as phone calls or emails, to a customer for future reference. You can also filter for past events to check on previously logged notes.
Campaign history will show you all Campaign messages sent to this customer with the date and title.
.
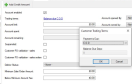
Loyalty points displays the spending history for points on this customer account, along with the ability to add points (either a credit or debt).
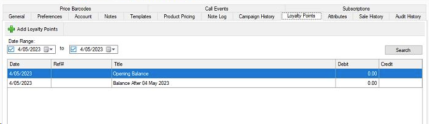
If you select Add Loyalty Points from the top you will see the below form.
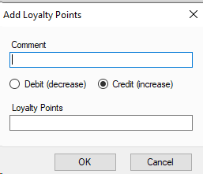
Comment - Enter a note here for the reason for the adjustment.
Loyalty points - Enter the amount being credited or debited.
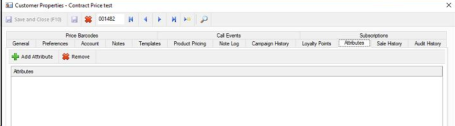
Customer attributes are used for Campaigns, searching for orders, and some sales reports.
You can add and remove attributes from this section.
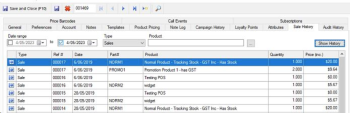
In sales history you can select the date range, type of sale (Quote, Order, or Sale), and even filter by only those containing a specific product. Once you have found a result you can click the blue arrow on the left hand side to open that record up.
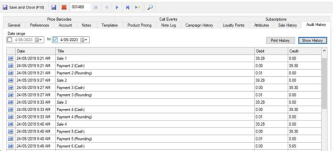
Audit history is a way to review the debts and credits on a customers history. You can filter this by date, and print it to provide to a customer as well.
Pressing the blue arrow next to a record will also open the related order, sale, or refund for you to action or review further.
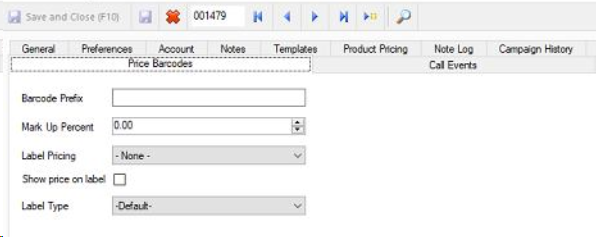
Price barcodes allow you to configure a unique barcode for your customer. This includes using their prefix, setting either a markup percentage for when they resell or a different price to print that they will sell at. You can also control what label it uses for this customer along with if they want the price to display on the label.
Call events are a schedule to remind you of events for this customer. With this you set the day, time, and how often it should happen along with the user and a title for the event.
This does not create any pop ups, and is meant as a reference to check when a customer is due for a check in.

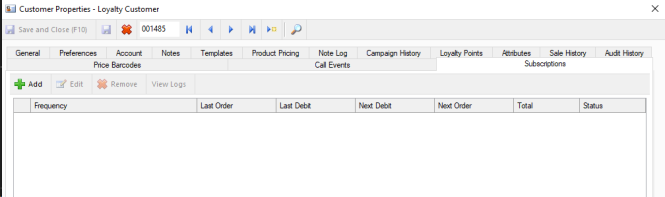
This section will display any subscriptions the customer actively has currently, and allow you to manage them on a customer basis.
Please note this only displays if you have the subscription module.