Exporting to Xero
Below are the steps for setting up your initial connection and accounts, exporting for the first time, and some advice on errors you may run into.
Please note this is not accounting advice, and we recommend speaking to your accountant before taking any steps involving your accounting package.
To start setting up your Xero export first go to Settings > Global Settings > Accounting Export. In here select Xero from the Account Export type drop down, before setting up your other options displayed based on your accounting practices. Below is an example of how we have set one up.

Once this is done you will have an option called Xero Export below Accounting Export, open this menu with the small plus next to its name, and select Xero Accounts.
Before connecting you will see the below options.

Press Connect to Xero, which will open a new browser window and ask you to login before selecting the organisation you want to connect with to export to.
Once this is done you will return to these settings and have a list of accounts to set up. The first time you do this you will need to go through the Main Accounts, Product Accounts, and Tax codes tabs to set up the matching Xero account for these each. If you are using tracking categories these will also display as a new tab for you to select from.
Once this is done you can press OK on the bottom of settings to save these account details.
To start an export first go to File > Accounting Export.
You will see the below window.
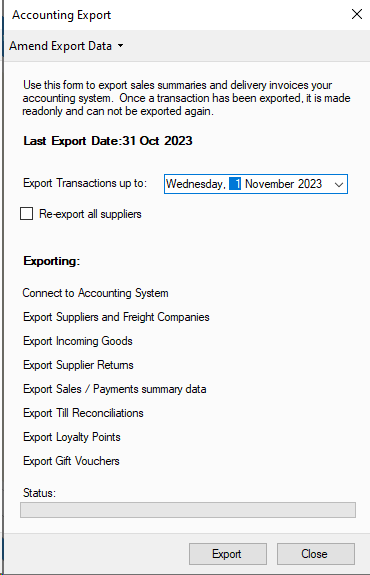
On the top you can select Amend Export Data to select to roll forward or back your export. An important note is this will not edit the data already exported into your accounting package, so you need to ensure you also manually adjust any data in Xero if needed.
By default the Export date will be the day before the current date, however you can change this to the date you want to export up to. If you have large amounts of data to export we suggest doing this one day at a time.
You can see in bold the last export date above this as well, which lets you know the last completed export date.
Once you press Export it will start going through each of the export groups listed, and will notify you once completed or if any errors are found.
To disconnect your Xero organisation you just need to go back to where you set up your accounts originally, File > Settings > Global Settings > Accounting Export > Xero Export > Xero Accounts. In here you will see a button called Disconnect Xero. Pressing this will disconnect our application from your organisation, and will revoke any tokens we have for Xero. If you reconnect your Xero account, even if you previously had a still valid refresh token, you will need to login and PBSA POS will need to obtain new tokens for use.
The most common error encountered is a time out prompt when you are sending to much data at once, this is most common when exporting at the end of busier trading periods, or when bringing in large amounts of incoming goods in a short time frame. To resolve this reduce your date selection, if you obtain this error we normally suggest exporting one day at a time.
If for any reason you obtain time out errors or any error referencing rate limits when exporting only a single day, and you have tried again after any time period mentioned in the error message, please contact PBSA Support so they can assist further.
Other errors often found are related to exporting data into the wrong account type, the best way to validate these is to check in File > Settings > Accounting Export > Xero Export > Xero Accounts. That the account name it mentions in the error is set correctly, and validate this matches the account information you can see in Xero directly.
Please note this is not accounting advice, and is only an example of a work flow to help understand how you can reconcile the journals from PBSA POS in Xero.
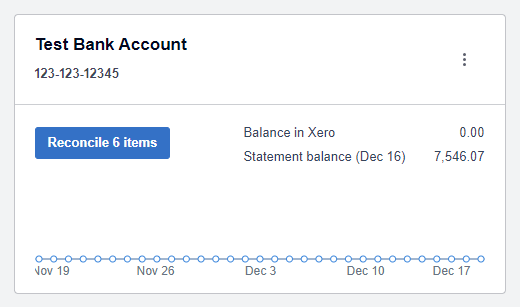
If you have your bank account linked to Xero you will see something similar to below, where it advises your statement balance, balance in Xero, and items to reconcile if applicable. Then select "Reconcile 6 items" to open the bank account. This should be the bank account you are processing your cash deposits, eftpos payments, and direct deposits into. If those are different accounts then simply repeat this process with each account.
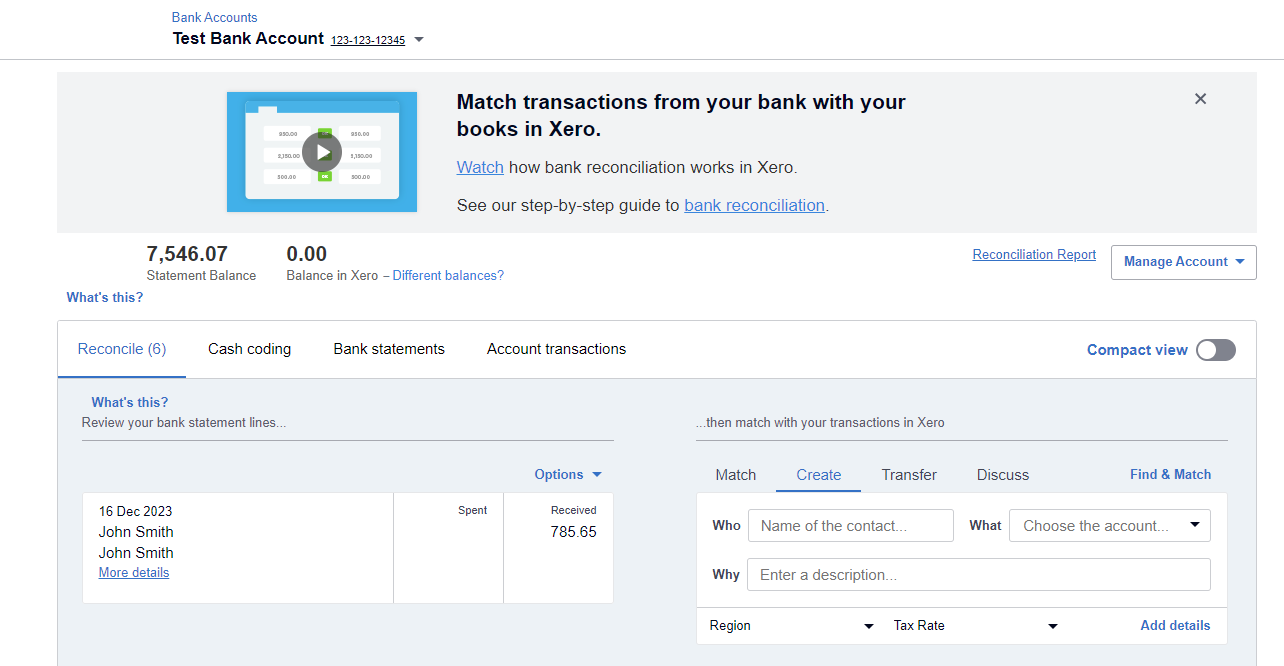
Now we have this account open you have two options. You can use the options on the right to create the matching record to create these transactions into the correct account, however we recommend using the Cash Coding option.
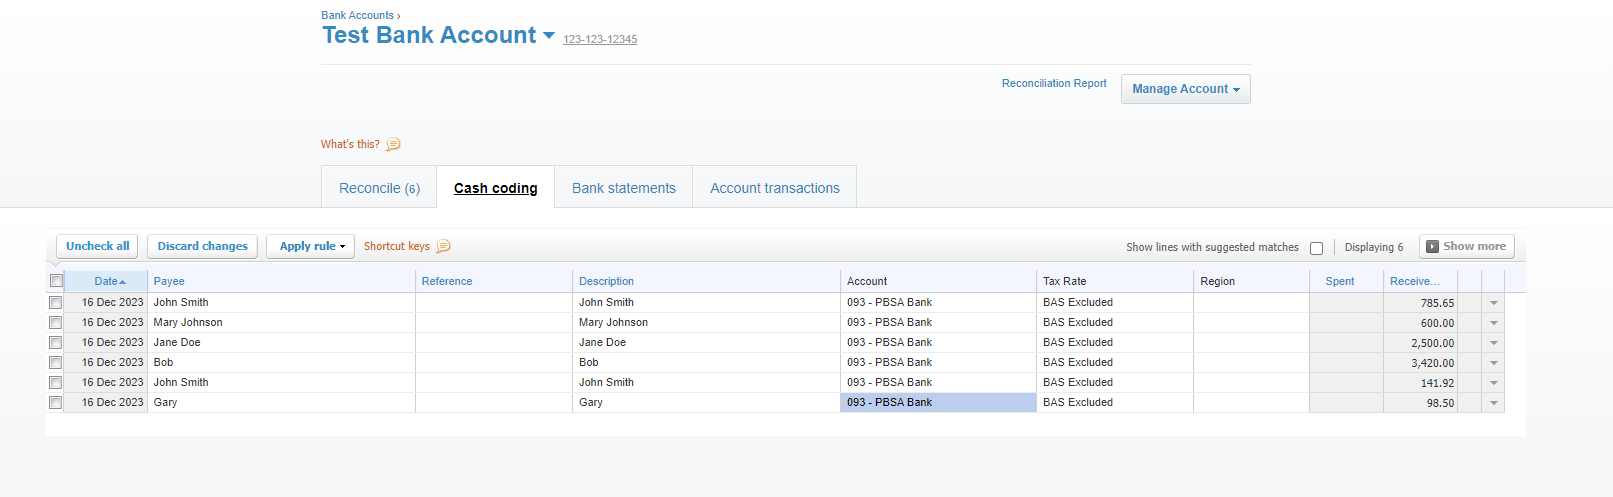
Once you have selected Cash Config you should see a list like below with all of your transactions to be reconciled.
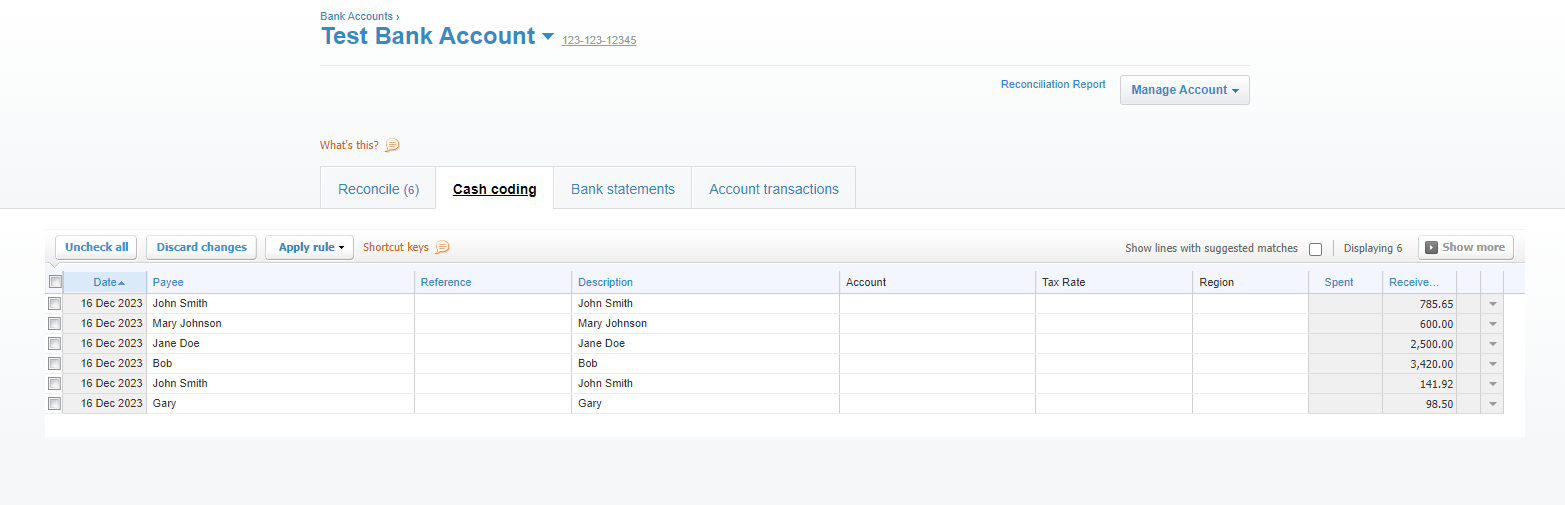
As shown below next set it to your clearing account, in this example we have named it PBSA Bank. What this does is post a credit into the PBSA Bank chart of account, that balances out the journal exported by PBSA POS.