Line validation
Line validation is most commonly used for more complex meat line items where you need to determine a range of values.
We go over some examples below through the instructions on how to set this up, but it is able to support almost any set up you need.
To set this up you will first want to go into the global settings, and open 'Quotes/Orders/Sales' before selecting 'Order/Sale Line Validation'.
In here you can set up any line validations you want to use, then what type they are of the three.
Yes/No - This is for something like Vacuum packed, where you just wanting a simple tick box to say yes or no. This can also include a tare weight when set on the product, allowing you to alter the tare weight value for different packaging types.
Number - This is for something like Kgs per pack, where you need to enter a specific value.
Calculation - This is used for doing a calculation on other values, such as how many trays you need if they ordered a set amount and have another set amount per tray they use.
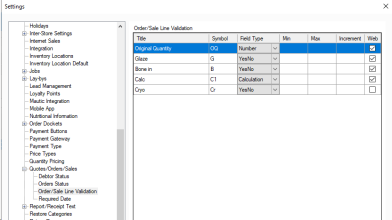
Along these lines you will see the following fields.
Title: Title of validation rule, must be unique.
Symbol: Symbol shown on line item for this validation where applied, must be unique.
Field type: Fields are described in more detail below with rules on how to use them.
Min: minimum value allowed for this validation.
Max: Maximum value allowed for this validation.
Increment: Increment to be used for increases/decreases.
Web: If you want this rule available online, only available for PBSA .Net shopping carts.
Each field has its own use case and they can tie in together, such as calculations using original quantity.
Number: This field just allows a flat number to be entered, such as the original quantity.
YesNo: This field is used just to set if something is a yes or no, such as if the customer wants glaze on a ham or if they want bone in or bone out.
Calculation: Calculation is used to determine what quantity to sell, such as when you want to know how many kg's to sell when the customer is ordering in trays or packs. The work flow example further down contains a practical example which will help explain this field.
Line item validation can also be made inactive or active in the settings where they are set up. You cannot reuse existing line validation symbols or titles even when made inactive, so if you want to recycle a symbol or title you will need to update the inactive one to have a different symbol or title set.
Once this is done you will want to navigate to a product card, and select the header menu for line validation.
In here once you tick the enable line validation tick box you will be able to select what options you want to enable on the product card, and set any default values.
You are also able to set the Original Quantity Unit and where it appears. So if you only use these for wholesale orders you would want Appear to be set to Orders, while if you used them for all sales and orders you would set it to All.
First you will need to set up your tare weights against your units, you can do this in Settings > Global Settings > Units.
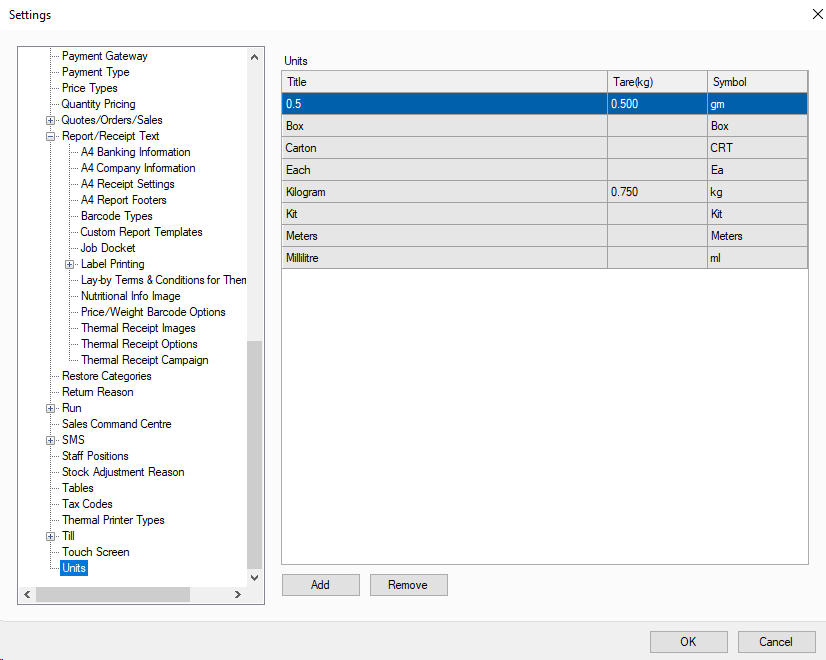
Once you have a tare weight set here you can add a Yes/No line validation with the unit type matching. Now when this option is ticked yes for a product the tare weight will update to match this setting instead of the products default tare.
In this example we are setting up sliced ham that can be purchased smoked or not smoked, and by the kilo, pack, or box.
First we want to set up the rules, you will see below we have original quantity which is always there by default, along with one called Smoked that is a yesno field, and one for packs with another for boxes.

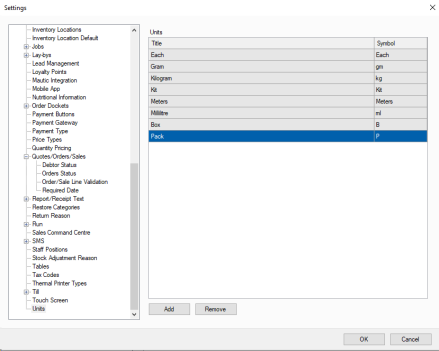
We also need to ensure we have the units for trays and boxes, which you can create by going down to units in your global settings and adding them, so it looks like you will see below.
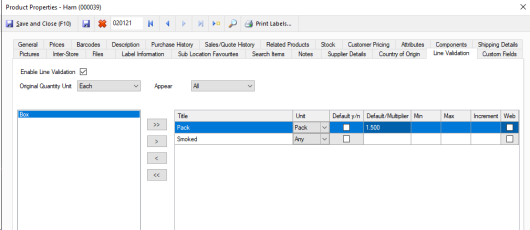
Now we can go to our ham product and go to the line validation tab and tick the Enable Line Validation check box.
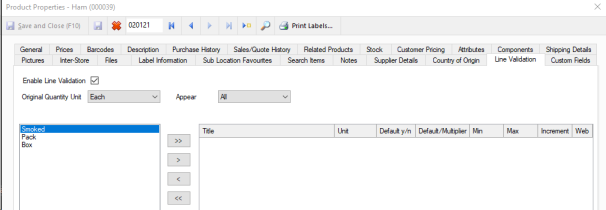
We will want to change this here so that we have all three of those options in the list on the right, along with setting up our defaults as shown below.
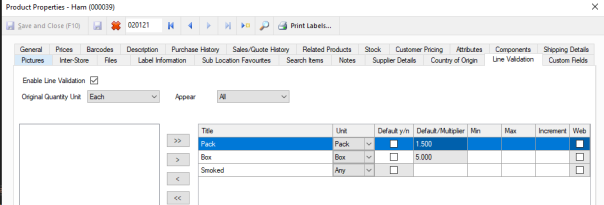
So in this we have added the default multiplier for both pack and box to the amount of kg normally put in these units, in our example this is 1.5kg and 5kg. We have also set their unit to be the unit type we want to use for those options, which is box and pack, while smoked is set to be for any unit as they all use this option.
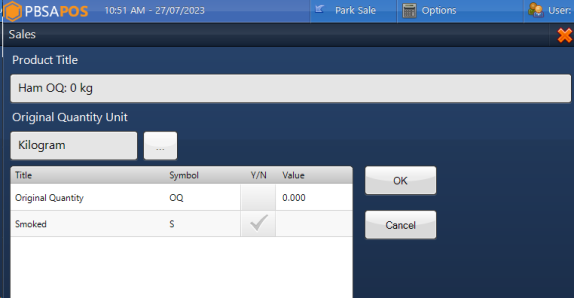
Now when doing a sale in touch when you add the ham you will see the below screen, in here you can select in the top left what unit the customer wants to buy in, then set the original quantity to be the amount of those they want.
So first select the three dots next to the unit type to get the below screen.
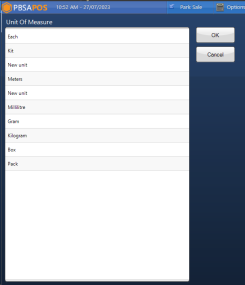
Then simply select the unit they are after, such as pack for my example, and press ok.
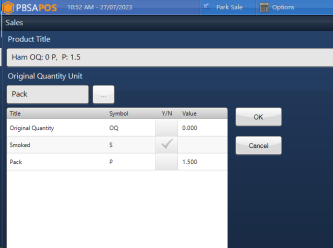
Now we can set the original quantity which is the number of packs they are after.
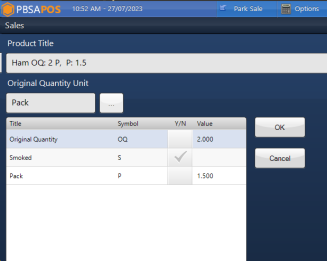
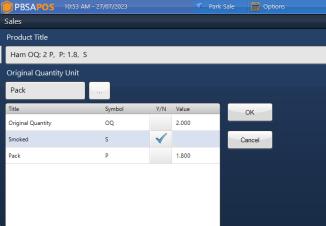
In my case the customer wants 1.8kg per pack not 1.5, so we just change the value against pack so it knows how much weight I am putting into each one to calculate the total. We have also ticked Smoked because they want the smoked ham rather then the non-smoked.
Now when we press ok it knows that because they want two packs at 1.8kg each it needs to charge for a total of 3.6kg and will display this information along the line items name as you can see below.
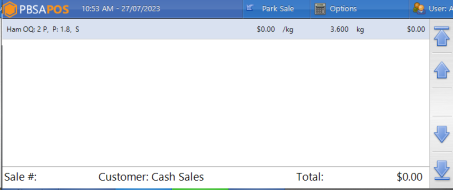
Now we can complete the sale or order as normal, while knowing exactly how many packs and weight per pack the customer is after while still pricing and charging it by the kg.